This weekend I found some gorgeous red bell peppers at my local greengrocer's.
Roasting red peppers brings out their smokey sweetness - that's why I call it candy. I bet you'll find yourself eating them as fast as you can peel them.
Keep them packed in olive oil in the fridge and add them to sandwiches, pasta, salads, or have them on their own, sliced and drizzled with balsamic vinegar and chopped basil.
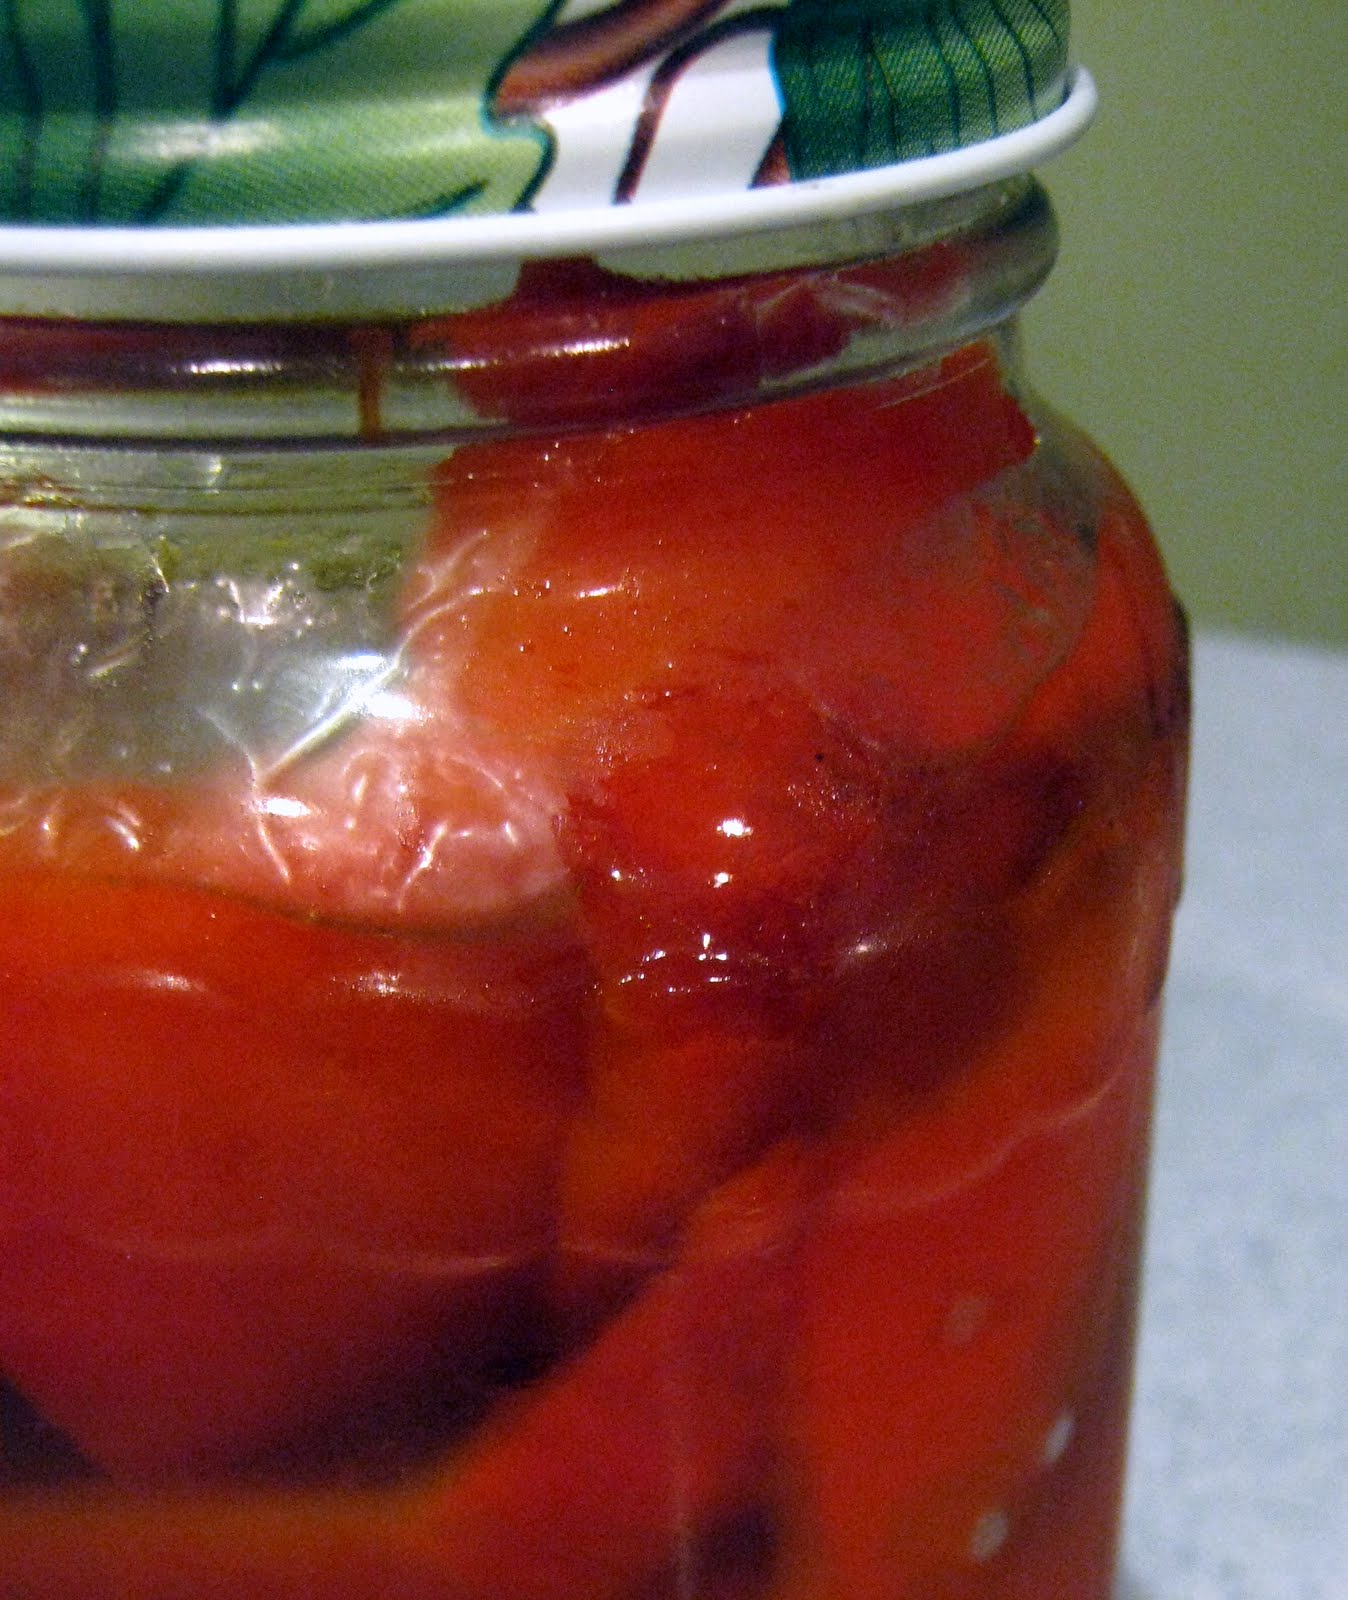
Red Pepper Candy
(Enough for a one-litre jar)
6 large red peppers
2 cookie sheets lined with foil
1 large glass bowl
Plastic wrap
1 1L glass jar with lid, sterilized
Cut the tops and bottoms off the peppers. Twist the stems and cores out.
Slit each pepper down one side and "unroll" the pepper, pressing it down with your palm to flatten, so that it ends up in one long strip. Lay it out on your cutting board, skin side down. Holding your knife parallel to the cutting board, run it along the pepper to remove the ribs. You may have to trim the insides of the tops, too.
Lay each pepper, skin side up, on the cookie sheet, along with the tops and bottoms. A cookie sheet will hold about 3 peppers.
Move your oven rack to the topmost level. If it is more than 3.5 inches from the heat element, use a cookie pan with sides, turned upside down, to bring the peppers within 2.5 - 3 inches of the element.
Slide in the peppers and turn on your oven at its broil setting. Depending on the size of your oven and cookie sheets, you may have to do one sheet at a time.
Roast the peppers until the skins are blackened in spots. This doesn't take very long, about 3-5 minutes.
When the peppers are done, pop them into your large bowl and cover with plastic wrap. Let it steam away for 15 minutes. This cooks the peppers a little bit more and makes them easier to peel.
When they are cool enough to handle with your fingers, peel the peppers. You can eat them immediately or pack them in a jar with olive oil. They will last a couple of weeks stored in the fridge.
Recipes and household tips from all over the world to beat the recession, use up leftovers, prevent food waste, save money & get healthy
Showing posts with label preserving. Show all posts
Thursday, 20 May 2010
Tuesday, 18 May 2010
The Secret to a Full Stomach, Empty Bin and Jingling Purse!
As a working couple, we do a big shop every Saturday. To maximise freshness of food and minimise food waste we knock our heads together before we go out - we write a shopping list! It’s simple and quite effective:
- Talk: First we discuss when we are going to be home, whether there will be guests and who is going to cook for the next few days. Communication is key!!
- Plan: Then we put down what we would like to eat depending on individual cooking capabilities and time at hand. We are not very creative during the week but at weekends we make an effort of trying out new things (which can be incorporated into our weekday routine) or dishes that take longer to prepare. What’s going on the eating plan depends on following:
o If there is a dish that needs a little of e.g. cream, then we’d make sure there is another recipe on the list that also needs a little cream.
o Allow for seasonality of ingredients
o Dishes with ingredients that don’t stay fresh for long are cooked earlier in the week
o The shopping list takes us up to Wednesday
Then we pop down the ingredients needed on a list.
- Shopping: We try to stick to the list! If there is a great offer on we think twice whether we really need it and when we could possibly eat it. Pre-packed fruit and veggies are avoided where possible. They are usually much more expensive per lb/Kg so we only buy what we really need and avoid the packaging.
- Mid-week stock take: As I said, we only plan until Wednesday and we take food stock on Tuesday or Wednesday. It happens very often that there are some leftovers, not everything has been used up as planned, we weren’t home as planned etc. So we look at the fridge for what’s left, is there something expiring soon and how these things can be combine with other ingredients to make another dish. I.e we talk again what we want to eat for the rest of the week.
It takes being organised but it’s really worth it. I hardly have to get rid of any food because I know what’s in the fridge and what I can make with it...
- Talk: First we discuss when we are going to be home, whether there will be guests and who is going to cook for the next few days. Communication is key!!
- Plan: Then we put down what we would like to eat depending on individual cooking capabilities and time at hand. We are not very creative during the week but at weekends we make an effort of trying out new things (which can be incorporated into our weekday routine) or dishes that take longer to prepare. What’s going on the eating plan depends on following:
o If there is a dish that needs a little of e.g. cream, then we’d make sure there is another recipe on the list that also needs a little cream.
o Allow for seasonality of ingredients
o Dishes with ingredients that don’t stay fresh for long are cooked earlier in the week
o The shopping list takes us up to Wednesday
Then we pop down the ingredients needed on a list.
- Shopping: We try to stick to the list! If there is a great offer on we think twice whether we really need it and when we could possibly eat it. Pre-packed fruit and veggies are avoided where possible. They are usually much more expensive per lb/Kg so we only buy what we really need and avoid the packaging.
- Mid-week stock take: As I said, we only plan until Wednesday and we take food stock on Tuesday or Wednesday. It happens very often that there are some leftovers, not everything has been used up as planned, we weren’t home as planned etc. So we look at the fridge for what’s left, is there something expiring soon and how these things can be combine with other ingredients to make another dish. I.e we talk again what we want to eat for the rest of the week.
It takes being organised but it’s really worth it. I hardly have to get rid of any food because I know what’s in the fridge and what I can make with it...
Tuesday, 23 February 2010
Keeping Cheese for Longer
A friend has kids who are lactose intolerant, but loves cheese herself. Buying a large amount of cheese can be cheaper, and I thought I would share a great tip for keeping cheese soft- hard and cracked cheese is not as attractive in salads and the crunch doesn't add anything particularly positive to sandwiches.
She tightly wraps her cheese in a cheese cloth which she has rubbed butter into and leaves it in a cool, dark place (fridges can be damp and can actually make cheese go mouldy more easily). Besides, cheese tastes better at room temperature. The cheese keeps fresh and neother goes mouldy nor cracks. The fat in the cloth stops bacteria, moulds and damp getting in.
Cheese needs to breathe, so wrapping in cling film is not always the best option for long term preservation, and remember that cheeses can absorb smells and strong smelled cheeses can make other food smell.
Other tips:
She tightly wraps her cheese in a cheese cloth which she has rubbed butter into and leaves it in a cool, dark place (fridges can be damp and can actually make cheese go mouldy more easily). Besides, cheese tastes better at room temperature. The cheese keeps fresh and neother goes mouldy nor cracks. The fat in the cloth stops bacteria, moulds and damp getting in.
Cheese needs to breathe, so wrapping in cling film is not always the best option for long term preservation, and remember that cheeses can absorb smells and strong smelled cheeses can make other food smell.
Other tips:
- You can always freeze cheese. You need to make sure it is airtight and sealed to prevent freezer burn. This is fine for cheeses like cheddar, and cheeses that you want to use for cooking, but I wouldn't recommend it for soft or cream cheeses, or a speciality cheese.
- Mouldy hard cheese is not dangerous, although it may not taste great. Just cut off the mouldy part and a little more (5mm, 1/4 inch) and it will be fine.
- You could just brush the cut end of the cheese with butter or olive oil
- If you have a bit of left over cheese you could always make a Mediterranean-inspired cheese in olive oil.
- The general principle is to try to keep it dry and airtight. Some people use aluminium foil, others may use a cloth or paper towel sprayed with vinegar to keep it air tight. The vinegar flavour would affect the taste of the cheese though...
photo with thanks to MarxFoods.com
Mediterranean Inspired Cheese Preserved in Olive Oil
Olive oil- golden goodness. We have heard it said hundreds of times, but have you ever thought of it as a preservative? It keeps out air and the bacteria that lurk in it
It has long been used as a traditional preservative in Mediterranean countries, and you can often find Greek feta or halloumi, or the Spanish sheep's milk cheese, Manchega, preserved in olive oil.
If have bought lots of cheese which you are not sure how to get through, want to make an exciting tapas or are just feeling creative, why not try preserving cheese in olive oil?
Before you preserve the cheese:
bottom photo with thanks to Neven Mrgan
It has long been used as a traditional preservative in Mediterranean countries, and you can often find Greek feta or halloumi, or the Spanish sheep's milk cheese, Manchega, preserved in olive oil.
If have bought lots of cheese which you are not sure how to get through, want to make an exciting tapas or are just feeling creative, why not try preserving cheese in olive oil?
Before you preserve the cheese:
- It must be clean and dry. Use paper towels and cut off anything you have doubts about. Make sure your hand are clean before you touch it.
- The jam jars or kilner jars you use must be completely clean and dry and sterilized.
- Cut the cheese into small cubes and place in the jar
- Cover the cheese with olive oil, although not right up to top of the jar.
Extra virgin olive oil will give you the best flavour. - You might want to add some flavours to the oil, such as garlic cloves, sprigs of rosemary, chili peppers, oregano, thyme and basil. They should be dry.
- Once you open it, remove any sprigs of herbs- once exposed to the air they might deteriorate and the oil will already have taken on the their flavour.
- Don't waste the oil! Drizzle it over salads, fresh bread or as an accent on top of a bowl of home-made soup.
bottom photo with thanks to Neven Mrgan
Nutritious Nettles
If you ever ran outside in shorts as a child in the countryside, chances are that you realised the hard way that this country is full of stinging nettles.
But nettles, far from only being a blight, can also provide great (and free) greenery for you kitchen.
Nettles can be substituted for spinach in most recipes. Younger nettles will be sweeter than older nettles.
To pick nettles it is advisable to wear rubber gloves. Chop the nettles and blanch
To freeze nettles (they will last around 2 months in the freezer- defrost for ~ an hour in a bowl of cold water) 2lb of nettles will reduce, like spinach, to give you around 4 cups.
- Remove the leaves from the stems
- Blanch (to stop decay even whilst frozen and to get rid of the stingi-ness). You need to do this in a large pan of boiling water over a high heat. Drain, retaining two cups of water, once the water returns to the boil.
- Saute gently in olive oil over a fairly gentle heat. You might want to add chopped garlic, chili flakes to the pan first. Stir them in the oil for a couple of mins to release their flavours. These flavours will intensify in the freezer. You need to cook them until they are mushy and most of the water has been cooked out.
- Separate them into freezer bags, remove the air and remember to write on the date. Put in the freezer when they are cool.
photo with thanks to Mr & Mrs Stickfingers
Labels:
cheese,
Italian recipes,
leftovers recipes,
nettles,
preserving
Keeping Hen's Eggs Fresher for Longer
The delicious smell of rotten eggs. I'd be happy to never have to smell it again.
Buying eggs
- The colour of the shell isn't important, but shiny eggs are likely to be older (the eggs above have been died so are meant to be shiny).
- Back in the day, when hens laid fewer eggs during midwinter, people would store eggs in advance by gently rubbing a little butter onto the shells. The butter stops air moving through the porous shells so that bacteria cannot get in. Instead of butter you could use oil or glycerine. Put them in a pot with a lid and store in a cool, dark place. A cellar is perfect. Best for fresh eggs- eggs bought in shops may already have been treated with preservatives and you can never tell how old they are. Make sure that you wash the eggs first do get off any dirt before you brush them with butter.
- Mark eggs with a pencil. You can devise your own secret code, but even a small line would help you tell older ones from newer ones.
- Find out how fresh your egg is. Put it in a cold water. Fresh eggs lie on their sides, older eggs will stand upright. Eggs that float to the top are old- avoid at all costs!
- If you aren't going to put oil or butter on your eggs, don't wash them before storing! Washing them will also remove the protective coatin and they will actually go off more quickly.
- Sometimes it can seem that the only place for a cracked egg is the bin. But you can still boil it if you wrap them in foil first, or you could always freeze it (see below). This is only a good idea if you cracked the egg yourself! If it arrives cracked, best to dispose of it as you cannot be sure what could have got into the egg.
- Cover egg yolks in water to keep them for longer
- Egg whites needs to be stored in a clean, dry, air-tight container.
- To insure lasting freshness of eggs, rotate and mark them. If you place a small pencil mark on old eggs you will be certain to identify them and use them before recently purchased eggs.
- When you hard boil eggs and are intending on keeping them stocked in the fridge, have you thought of putting a drop of food colouring the water to make sure that you can distinguish them from raw eggs? Another, greener, more waste-friendly tip is the traditional Cumbrian method of boiling eggs with onion skins. The more onion skins, the stronger the dye.
- Don't be tempted to freeze boiled eggs. Their texture and taste will change.
- Break the yolks, as they don't freeze well otherwise.
- You can freeze yolks and whites separately, or together.
- If you mix yolks and whites together and freeze in an icecube tray, two cubes would be equivalent to a large egg.
- Whole eggs cannot be frozen; the shells will crack as the liquid expands.
- If you add one teaspoon of vinegar to water when boiling eggs they may not crack.
- Cotton-buds are you friend if you only want egg white. Even a little yolk or oil can ruin a recipe, so remove drops of yolk with a cotton bud. If you are using an electric whisk ensure that there is no oil on the blades.
- Slice hard boiled eggs more easily by dipping the knife in water first.
photo with thanks to ANDI2...trying to catch up
Labels:
boiled eggs,
egg whites,
egg yolks,
onion,
onions skins,
preserving
Subscribe to:
Posts (Atom)


