Following on from this delicious version, and having also stocked up on Turkey steaks at Morrisons, I made another version of my After Party Turkey.
I marinaded the turkey steaks (4 thin slices) in the leftover wine (in this case, red, about 1/3 of a bottle or two small glasses) with two peeled garlic cloves, about 8 squished tomatoes (they had mysteriously frozen in our amazing fridge and had thawed to a pulpy splat) and half a teaspoon of pimenton (smoked paprika).
The next evening I browned the turkey and also sauteed a medium sized onion. When done, I added the wine, tomatoes and garlic and simmered until the wine was well reduced, created a lovely sauce.
Great meal from two ingredients that would so easily have ended up in the bin- the tomatoes and wine : )
Saturday, 27 November 2010
Monday, 15 November 2010
Moro-ish meatballs with pepper sauce
Recently I got carried away in Morrisons where they had great deals on beef mince. An enormous bolognese sauce later, there was still 1.5 kilos left. I decided to be brave and make something that I've never made before- meatballs. This was further complicated by the fact that I don't eat bread so would need a bread-crumb free version. My friend wanted "something with a winter flavour" so I opted for "vaguely Moro", dependent upon what was in the cupboard. I had pimenton (smoked paprika) from a previous recipe and apricots thanks to canapes that I had made for a party the night before. These combined with other ingredients to makes something rich, warming and satisfying.
.jpg) You need:
You need:
3/4 kg lean beef mince
8 dried apricots
1 teaspoon pimenton
two spring onions
two medium sized onions
four peppers (red & yellow, not green)
two tins of tomatoes
500g fresh tomatoes
1/4 tea spoon allspice
three cloves garlic
two heaped tablespoons hemp flour
1 egg
one tea spoon butter
For the meatballs:
Mix the beef with the finely chopped spring onion and one diced onion. Add four finely chopped dried apricots, two minced cloves of garlic, half the pimenton, the hemp flour and the allspice. Mix them very well and then mix in the beaten egg. Form the mince into balls about 4 cm diameter and brown in a hot frying pan.
 For the sauce
Saute the other onion, diced with some olive oil and the spoonful of butter. Add the remaining pimenton and a whoel clove of garlice. Add the peppers, diced and saute also. When they have softened, add the fresh tomatoes, chopped, and five minutes later the tinned tomatoes, with an additional canful of water, bring to the boil and simmer. If the sauce is bitter after about 20 minutes of cooking, and a couple of apricots. Blitz the sauce until smooth with a hand mixer.
To serve:
The great thing of this recipe is that you can make it in advance and then just heat the meatballs up in the sauce. Great served over rice or pasta.
Tips:
Obviously, the meatballs could be made with very different flavours, and the sauce could also be made with different vegetables and spices.
3/4 kg lean beef mince
8 dried apricots
1 teaspoon pimenton
two spring onions
two medium sized onions
four peppers (red & yellow, not green)
two tins of tomatoes
500g fresh tomatoes
1/4 tea spoon allspice
three cloves garlic
two heaped tablespoons hemp flour
1 egg
one tea spoon butter
For the meatballs:
Mix the beef with the finely chopped spring onion and one diced onion. Add four finely chopped dried apricots, two minced cloves of garlic, half the pimenton, the hemp flour and the allspice. Mix them very well and then mix in the beaten egg. Form the mince into balls about 4 cm diameter and brown in a hot frying pan.
Saute the other onion, diced with some olive oil and the spoonful of butter. Add the remaining pimenton and a whoel clove of garlice. Add the peppers, diced and saute also. When they have softened, add the fresh tomatoes, chopped, and five minutes later the tinned tomatoes, with an additional canful of water, bring to the boil and simmer. If the sauce is bitter after about 20 minutes of cooking, and a couple of apricots. Blitz the sauce until smooth with a hand mixer.
To serve:
The great thing of this recipe is that you can make it in advance and then just heat the meatballs up in the sauce. Great served over rice or pasta.
Tips:
Obviously, the meatballs could be made with very different flavours, and the sauce could also be made with different vegetables and spices.
Friday, 5 November 2010
I'll convert you to sprouts!
 Sprouts have an incredibly bad press. And it's true- an over boiled sprout is neither beautiful to behold, has a whiff of its own and tastes, well, like the proverbial sprout.
 This dish- a spicy, crunchy, colourful meal- is none of those things!
For one (increase quantities for more people) (can be served with rice or noodles)
Ten fresh sprouts, quartered
A medium sized onion (or a couple of banana shallots), diced
Curry Powder (medium)
Toasted Sesame Oil
Olive Oil
half cupful of red-skin peanuts/ cashews (raw) or a mixture
Add a generous splash of toasted sesame oil to a wok, and a liberal amount of olive oil. Put on a high heat.
Add the nuts, and the chopped vegetables.Add a generous sprinking of the curry powder.
Stir! The heat needs to be high to toast the nuts. However, the vegetables will burn if you do not pay attention!
tip: I bought the sprouts on a tree, which should keep them fresher for longer : )
Friday, 22 October 2010
WONDER likes: Foraging
Free, nutritious, exciting. Foraging is all of these things.
We featured stinging nettles before, now we want to share this incredible blog.
 I have my eye on the Hawthorn Jelly and the other eye peeled for an unsuspecting hawthorn bush!!!
We featured stinging nettles before, now we want to share this incredible blog.

Tuesday, 21 September 2010
Italians on Horseback
 Devils on horseback- I had them as prunes wrapped in streaky bacon growing up- some would argue that the real "devils" are chicken livers wrapped in bacon. Angels on horseback are supposed to be oysters wrapped in bacon- my grandma make them with dried apricots.
Returning home exhausted without having shopped for real food for a while, I resorted to what I will call "Italians on Horseback". I had 6 tomatoes and a pack of bacon rashers, both of which were in need of consumption. I halved the bacon longways and quartered the tomatoes.
Our oven is broken and a mystery unto itself. These should have gone into a baking tray with a drizzle of olive oil- however, they went into a griddle pan on the hob with a generous sprinking of sage and occasional turning.

Thursday, 16 September 2010
Pesto Presto
Pesto and pastes have been on my mind. I had a few bashes at hummus making earlier in the summer, which nearly blew up my hand blender. Great fun though! Following that I have been intrigued about making other bean pastes (apparently hummus = chickpea, so the term cannot be carried into other bean genres). White bean "hummus" sounds tasty, perhaps with paprika and garlic in vegetarian fusion food version of fabada asturiana.
 Hunger and desperate times lead us back to pasta al pesto. And with fresh pesto it is so tasty! I am thinking- what about a green pea pesto?
Here is a pesto recipe (from smitten kitchen) that I would love to try:
Linguine with Tomato-Almond Pesto [Pesto Trapenese]
Adapted from Gourmet
3/4 cup slivered almonds
1 large handful fresh basil leaves
1 to 2 large garlic cloves
Several sprinkles of sea salt
6 ripe plum tomatoes, quartered
1/2 cup grated Pecorino or Parmesan
1/4 to 1/3 cup olive oil
1 pound linguine
In a large skillet, sauté the almonds in a little olive oil until toasted. Let cool, then blend them in a food processor or blender until they are in coarse pieces. (“The size of orzo,” the original recipe suggests.) Scoop them out of the processor and set them aside.
Put the basil, garlic and a few pinches of sea salt into the food processor and chop. Add the almonds back to the food processor (keeping them separate will keep them from getting too finely chopped as you get the basil and garlic to the right texture) with the tomatoes, cheese and olive oil and whirl briefly. Season it with freshly ground black pepper.
Cook your linguine until it is al dente and could use another minute of cooking time. Reserve one cup of pasta cooking water and drain the rest. Immediately toss the hot linguine with the pesto and mix quickly so that it drinks the sauce up a bit. Add more pasta water if needed. Serve this lukewarm, or at room temperature, with a glass of wine, after you get the baby to bed.
Another one that has been lingering in my mind is this- the recipe looks great and also references a walnut and kale pesto-
Wednesday, 15 September 2010
Fava Bean Inspiration
 I bought a kilo or two of dried fava (better known as broad) beans a couple of months ago. I love beans- they are healthy and nutritious and fill your tummy. Dried pulses keep for AGES and are cheap protein. They also require forethought, soaking and boiling, which means doing them for one is just not going to happen.
But this Mexican inspired fava/ chili/ mint soup looks like a winner for a future WONDER activity and need to cook for a dozen. Heidi Swanson, one of my kitchen inspirations, doesn't pre-soak the beans, which means that this is more likely to get cooked! I love the combination of chili and mint- best known perhaps in chicken tikka with mint yoghurt. The freshness and bitter-sweetness with the spice is incredible. The cheese/ chili/ mint combo here would, I imagine, bring similar qualities.
Will keep you posted!
Let me know if you have any other fava bean recipes. I imagine that they could also make a good curry.
Monday, 13 September 2010
Huntsworth Pork Stirfry
There is nothing quite like a stirfry to use up ends in the fridge- the vegetables you bought on two-for-one or because they were cheaper by the kilo but you really only needed 500g.
I had a couple of friends coming over for dinner, and then invited a couple more, and a couple more. Which could have been 8, but ended up as four. Stirfry again is perfect here- you can add a bit of this and a bit of that, until you have the right quantity. One couple said they had a pork roasting joint that noone had time to roast, so I took it home, chopped it into mouth sized chunks and marinaded it. I HATE the idea of an animal dying to be binned. The marinade was also experimental, depending on what we had in the cupboard.
 Juice of one Lime
Juice of one Lemon
glug of Olive Oil
glug of toasted sesame oil
heaped tablespoon of red curry paste
good pinch of ginger powder (fresh would have been better)
generous amount of brown sugar
The pork was marinaded for 3-4 hours in the fridge.
The cooking took 20 mins tops. Into a hot wok went the pork- there was plenty of oil in the marinade, some cashew nuts (if more people had come, we would have added more).We used up two heads of spring greens, which were just still fresh, cut into strips, one beautiful red pepper finely chopped, a not so young bunch of spring onions. There were courgettes waiting for some love. but we already had enough food. I chopped a couple of them into fine circles and stirred them into a pot of bolognese sauce I made for tonight. Extra nutrition- they will cook when I warm up the bolognese.
I had been a bit worried about the marinade- the sesame flavour have been overpowering when it was raw, but upon cooking the warm thai flavours came through and it was well balanced.
Worth doing again? Yes. Just what we needed on a Sunday night before a long week ahead!
Raw cashew nuts and peanuts are always worth having on hand to make a wok full of fried remnant vegetables into something quick delicious (and vegetarian). This would have also been great with a sprinkling of sesame seeds.
I had a couple of friends coming over for dinner, and then invited a couple more, and a couple more. Which could have been 8, but ended up as four. Stirfry again is perfect here- you can add a bit of this and a bit of that, until you have the right quantity. One couple said they had a pork roasting joint that noone had time to roast, so I took it home, chopped it into mouth sized chunks and marinaded it. I HATE the idea of an animal dying to be binned. The marinade was also experimental, depending on what we had in the cupboard.
Juice of one Lemon
glug of Olive Oil
glug of toasted sesame oil
heaped tablespoon of red curry paste
good pinch of ginger powder (fresh would have been better)
generous amount of brown sugar
The pork was marinaded for 3-4 hours in the fridge.
The cooking took 20 mins tops. Into a hot wok went the pork- there was plenty of oil in the marinade, some cashew nuts (if more people had come, we would have added more).We used up two heads of spring greens, which were just still fresh, cut into strips, one beautiful red pepper finely chopped, a not so young bunch of spring onions. There were courgettes waiting for some love. but we already had enough food. I chopped a couple of them into fine circles and stirred them into a pot of bolognese sauce I made for tonight. Extra nutrition- they will cook when I warm up the bolognese.
I had been a bit worried about the marinade- the sesame flavour have been overpowering when it was raw, but upon cooking the warm thai flavours came through and it was well balanced.
Worth doing again? Yes. Just what we needed on a Sunday night before a long week ahead!
Raw cashew nuts and peanuts are always worth having on hand to make a wok full of fried remnant vegetables into something quick delicious (and vegetarian). This would have also been great with a sprinkling of sesame seeds.
Friday, 27 August 2010
Chicken Liver with Figs
 This was a combination I read about and thought... ooh! ...interesting... erm?
 I was intrigued. Chicken livers are unbelieveably cheap when bought frozen and, with nothing else in the house and no time to shop properly, I defrosted them.
Sauteed two medium sized onions (I love onions- you might want to use only one), chopped the fig and tossed them in (I think it would have been better if it was riper) and washed and chopped the livers (250g).
Added a generous sprinkling of balsamic vinegar to the pan and ate it with a wholewheat wrap.
GOOD!!!
And leftovers for lunch : )
Thursday, 26 August 2010
Hum Hum Bean Soup
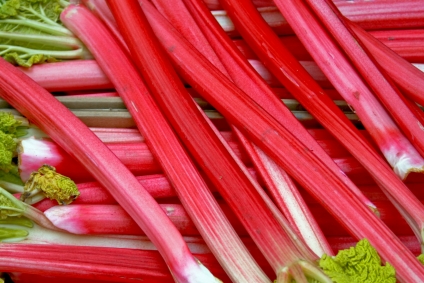
I needed to make space in the freezer the other day- I had made a much larger batch of fruit compote (rhubarb, pear and apple) than I had intended which needed freezing so that it didn't go off, so I took out the load of cooked beans that I had put in there before for similar reasons.
I had about a kilo of large white beans, boiled, once I had soaked them overnight out of their dry state (by far the cheapest way to buy beans is dried- you're not carting loads of water around) if I remember, with pepper, onions and dried red pepper flakes. Probably a sprinkling of chili flakes went in, maybe some herbs and a couple of bay leaves.
 Also found in the freezer- delicious home made chicken stock (don't bin anything until all the goodness has been taken from it!). I had cooked this up with some herbs, bayleaf and some wine that noone was going to drink.
Combining the beans and the stock in a pot with some water, some more unloved red wine, another onion and some of the canned tomatoes that I always have on hand, it came together into a lovely bean stew, which I blitzed to turn into a nourishing and delicious soup. I even gave some to my veg- detesting colleague (he had dated a vegan) and he was surprised to find himself enjoying it.
Now I need a way to use up 2l of fruit puree! Ideas, anyone?
I had about a kilo of large white beans, boiled, once I had soaked them overnight out of their dry state (by far the cheapest way to buy beans is dried- you're not carting loads of water around) if I remember, with pepper, onions and dried red pepper flakes. Probably a sprinkling of chili flakes went in, maybe some herbs and a couple of bay leaves.
Combining the beans and the stock in a pot with some water, some more unloved red wine, another onion and some of the canned tomatoes that I always have on hand, it came together into a lovely bean stew, which I blitzed to turn into a nourishing and delicious soup. I even gave some to my veg- detesting colleague (he had dated a vegan) and he was surprised to find himself enjoying it.
Now I need a way to use up 2l of fruit puree! Ideas, anyone?
Sunday, 1 August 2010
After Party Turkey

After party Turkey is delicious and adaptable. The key ingredient is a load of wine. That opened bottle of plonk that is not quite drinkable three days or a couple of weeks later is actually just what you need.
Put your turkey steaks in a bowl. As you put each one in add some ground black pepper and any other spices you would like to use (I used some crushed red pepper flakes and some thyme. I also added some chopped garlic and a diced shallot). Cover the turkey with the wine (Do not worry if you don't have enough- just make sure that all the turkey gets covered) and marinate. I marinaded mine for 24 hours.
When the time comes for you to cook the turkey, pop some olive oil in a frying pan and lightly coat with some flour (I used wholemeal). Fry until it is no longer pink in the middle and for no longer!
It should be deliciously succulent!
The same but different- After Party Turkey 2
Monday, 5 July 2010
Mumble Jumble Potatoes
For some strange reason do I always find pretty much everything I need for this recipe at home so I love to make it (and it is very tasty and popular with the husband). It is easy to just add more to serve more people and it is really delicious- the ingredients come together to make a really tasty meal!
 For two persons:
3-4 large potatoes (~1lb)
spring onions
pickled dill cucumber (gherkins)
1 hard boiled egg, roughly chopped
cooked ham, cut into small pieces
sour cream or creme fraiche
2 tbsp white wine vinegar
horseradish sauce or freshly grated, salt, pepper (quantities according to taste)
optionals:
finely chopped apple
cooked beetroot, diced
salted anchovies, roughly chopped
This recipe is extremely flexible so just use what you have or replace one thing with something else e.g. ham for roast beef leftover; mayonnaise instead of boiled egg, cream cheese instead of sour cream. Just remember than you can always leave things out!
Friday, 28 May 2010
Spinach and Bacon Salad with Roasted Red Pepper Bruschetta
Try this salad for an easy weeknight meal this summer. Serve with roasted red pepper bruschetta on the side.
In a large skillet/ frying pan, fry the bacon until crisp. Pour off oil. Add the spinach and mix with the bacon. Cook until just wilted.
Sprinkle the chopped egg on top and drizzle with ranch dressing. Serves 2.
Homemade Ranch Dressing
1/2 cup mayonnaise
1/2 sour cream
1 tbsp each of chopped dill, parsley, and chives
1 clove of garlic, finely minced
salt and pepper to taste
4-6 tablespoons buttermilk
Mix the mayo, sour cream, and herbs together in a small bowl. Use the buttermilk to thin the dressing to desired consistency. Season with salt and pepper.
Roasted Red Pepper Bruschetta
1/2 baguette, sliced in half lengthwise
 roasted red pepper slices with olive oil baby arugula/ rocket leaves 1 clove of garlic
Slice the garlic clove in two and rub over the surface of the baguette halves. Spread the olive oil from the roasted red peppers over the baguettes. Layer the arugula leaves and red pepper slices on top. Toast in the oven until the edges of the baguette slices are golden brown and crisp. Serve immediately.
Recipe thanks to Maria Olaguera
- 4 cups chopped fresh spinach, washed and drained very well (better yet, use a salad spinner)
- 6 slices thick bacon, cut into bits (Most grocery stores sell packages of bacon ends, which are cheaper than those nicely sliced breakfast rashers; it doesn't matter if they don't look pretty, because you will be cutting them up anyway.)
- 2 boiled eggs, chopped
- ranch dressing (see below for homemade recipe)

In a large skillet/ frying pan, fry the bacon until crisp. Pour off oil. Add the spinach and mix with the bacon. Cook until just wilted.
Sprinkle the chopped egg on top and drizzle with ranch dressing. Serves 2.
Homemade Ranch Dressing
1/2 cup mayonnaise
1/2 sour cream
1 tbsp each of chopped dill, parsley, and chives
1 clove of garlic, finely minced
salt and pepper to taste
4-6 tablespoons buttermilk
Mix the mayo, sour cream, and herbs together in a small bowl. Use the buttermilk to thin the dressing to desired consistency. Season with salt and pepper.
Roasted Red Pepper Bruschetta
1/2 baguette, sliced in half lengthwise
 roasted red pepper slices with olive oil baby arugula/ rocket leaves
 Slice the garlic clove in two and rub over the surface of the baguette halves. Spread the olive oil from the roasted red peppers over the baguettes. Layer the arugula leaves and red pepper slices on top. Toast in the oven until the edges of the baguette slices are golden brown and crisp. Serve immediately.
Recipe thanks to Maria Olaguera
Friday, 21 May 2010
Liver Two Ways: Italianese or Spicy with Rhubarb Yoghurt
 Liver is a bit like marmite in that you either love it or, well, you don’t.
 This liver was fresh from Smithfield’s market. Ox liver. I had never had good ox liver before, and I tried it over two days, two ways. Liver is cheap and nutritious, so it is a good value food if you can bring yourself to cook it!
Ox liver can be quite tough, but as this was fresh it was delicious. These recipes would also work with pig's or lamb's liver.
Liver Italianese

Turn up the heat in the pan, so that it is hot enough for the liver to sizzle when it goes into it.
Roll the strips of liver in the seasoned flour, and put into the pan. Turn the strips until they are brown on both sides- they should be in the pan for about 4 minutes. You want the liver to be cooked, not cremated, that way it is tender.
Serve with fresh bread for a simple meal, but make sure that you serve it piping hot and straight from the pan!
Spicy Liver with rhubarb yoghurt
In the UK, liver always seems to be served with onions. Actually, this recipes would work with onions too, but it is very good without.

You need:
- One tomato per person
- Olive oil
- Enough sliced liver for each person
- Garlic
- Chilli flakes
- Flour (I used millet flour)
- Yoghurt
Dice the tomato and fry- you want them to reduce to a thick consistency.
Mix the flour (I used millet here, which has a slightly nutty, sweet flavour and is a wholegrain flour, but you could use any wheat flour. It is inexpensive and can be bought in many African or Subcontinental shops) with the chilli flakes, some salt if you choose and the diced garlic. My advice here is to go spicier than you think that you would like- the yoghurt takes away some of the heat and it combines beautifully.
Roll the liver slices into the seasoned flour, lightly coating, and place into the same pan as the tomato, at a high heat. You will need to turn the liver regularly, for around 4 minutes, so that it doesn’t stick to the pan. Coat it in the thickened tomato.
Serve with a generous tablespoonful of yoghurt- the sweet and sour flavour of rhubarb yoghurt works well, but natural yoghurt, perhaps with a dab of mango chutney, would be delicious. Alternatively, try mixing some rhubarb or even gooseberry compote with your yoghurt.
Eat immediately, perhaps with plain or garlic naan bread and lentils.
Thursday, 20 May 2010
Red Pepper Candy
This weekend I found some gorgeous red bell peppers at my local greengrocer's.
Roasting red peppers brings out their smokey sweetness - that's why I call it candy. I bet you'll find yourself eating them as fast as you can peel them.
Keep them packed in olive oil in the fridge and add them to sandwiches, pasta, salads, or have them on their own, sliced and drizzled with balsamic vinegar and chopped basil.
 Red Pepper Candy
(Enough for a one-litre jar)
6 large red peppers
2 cookie sheets lined with foil
1 large glass bowl
Plastic wrap
1 1L glass jar with lid, sterilized
Cut the tops and bottoms off the peppers. Twist the stems and cores out.
Slit each pepper down one side and "unroll" the pepper, pressing it down with your palm to flatten, so that it ends up in one long strip. Lay it out on your cutting board, skin side down. Holding your knife parallel to the cutting board, run it along the pepper to remove the ribs. You may have to trim the insides of the tops, too.
Lay each pepper, skin side up, on the cookie sheet, along with the tops and bottoms. A cookie sheet will hold about 3 peppers.
Move your oven rack to the topmost level. If it is more than 3.5 inches from the heat element, use a cookie pan with sides, turned upside down, to bring the peppers within 2.5 - 3 inches of the element.
Slide in the peppers and turn on your oven at its broil setting. Depending on the size of your oven and cookie sheets, you may have to do one sheet at a time.
Roast the peppers until the skins are blackened in spots. This doesn't take very long, about 3-5 minutes.
When the peppers are done, pop them into your large bowl and cover with plastic wrap. Let it steam away for 15 minutes. This cooks the peppers a little bit more and makes them easier to peel.
When they are cool enough to handle with your fingers, peel the peppers. You can eat them immediately or pack them in a jar with olive oil. They will last a couple of weeks stored in the fridge.
Roasting red peppers brings out their smokey sweetness - that's why I call it candy. I bet you'll find yourself eating them as fast as you can peel them.
Keep them packed in olive oil in the fridge and add them to sandwiches, pasta, salads, or have them on their own, sliced and drizzled with balsamic vinegar and chopped basil.
(Enough for a one-litre jar)
6 large red peppers
2 cookie sheets lined with foil
1 large glass bowl
Plastic wrap
1 1L glass jar with lid, sterilized
Cut the tops and bottoms off the peppers. Twist the stems and cores out.
Slit each pepper down one side and "unroll" the pepper, pressing it down with your palm to flatten, so that it ends up in one long strip. Lay it out on your cutting board, skin side down. Holding your knife parallel to the cutting board, run it along the pepper to remove the ribs. You may have to trim the insides of the tops, too.
Lay each pepper, skin side up, on the cookie sheet, along with the tops and bottoms. A cookie sheet will hold about 3 peppers.
Move your oven rack to the topmost level. If it is more than 3.5 inches from the heat element, use a cookie pan with sides, turned upside down, to bring the peppers within 2.5 - 3 inches of the element.
Slide in the peppers and turn on your oven at its broil setting. Depending on the size of your oven and cookie sheets, you may have to do one sheet at a time.
Roast the peppers until the skins are blackened in spots. This doesn't take very long, about 3-5 minutes.
When the peppers are done, pop them into your large bowl and cover with plastic wrap. Let it steam away for 15 minutes. This cooks the peppers a little bit more and makes them easier to peel.
When they are cool enough to handle with your fingers, peel the peppers. You can eat them immediately or pack them in a jar with olive oil. They will last a couple of weeks stored in the fridge.
Tuesday, 18 May 2010
The Secret to a Full Stomach, Empty Bin and Jingling Purse!

- Talk: First we discuss when we are going to be home, whether there will be guests and who is going to cook for the next few days. Communication is key!!
- Plan: Then we put down what we would like to eat depending on individual cooking capabilities and time at hand. We are not very creative during the week but at weekends we make an effort of trying out new things (which can be incorporated into our weekday routine) or dishes that take longer to prepare. What’s going on the eating plan depends on following:
o If there is a dish that needs a little of e.g. cream, then we’d make sure there is another recipe on the list that also needs a little cream.
o Allow for seasonality of ingredients
o Dishes with ingredients that don’t stay fresh for long are cooked earlier in the week
o The shopping list takes us up to Wednesday
Then we pop down the ingredients needed on a list.
- Shopping: We try to stick to the list! If there is a great offer on we think twice whether we really need it and when we could possibly eat it. Pre-packed fruit and veggies are avoided where possible. They are usually much more expensive per lb/Kg so we only buy what we really need and avoid the packaging.
- Mid-week stock take: As I said, we only plan until Wednesday and we take food stock on Tuesday or Wednesday. It happens very often that there are some leftovers, not everything has been used up as planned, we weren’t home as planned etc. So we look at the fridge for what’s left, is there something expiring soon and how these things can be combine with other ingredients to make another dish. I.e we talk again what we want to eat for the rest of the week.
It takes being organised but it’s really worth it. I hardly have to get rid of any food because I know what’s in the fridge and what I can make with it...
Monday, 17 May 2010
A stellar spring dessert
Canadian WONDER woman Maria contributed this recipe from her blog
===
A recipe for no-bake cheesecake came through my Twitter feed this week. I hardly ever make cheesecake because every recipe I've come across seems to be so complicated and expensive. This particular recipe, however, is nice and small, calling for only one 250-gram block of cream cheese and yielding 4 individual-sized cheesecakes.
You will need a hand-mixer to whip the cream cheese and cream. The whipped cream adds lightness to the mixture, and a dash of lemon juice adds a bright note. Once properly chilled, the resulting cheesecake is sweet-tart, with a full, rich bite.
The original recipe suggested blueberries for the topping, but you can use any fruit you like. I thought I'd use strawberries. I was at my friendly neighbourhood Asian market, and actually had a container of strawberries in my hand when I spotted this beauty: the star fruit.

Not only is this fruit good-looking and exotic, it is also rich in vitamin C, fiber, antioxidants and flavonoids. Eat it (minus the cheesecake) if you want to lose weight. Or eat it with the cheesecake but with a little less guilt, because each whole fruit contains only 30 calories.

If you want an extra shot of sweetness, glaze the star fruit slices with a little sugar syrup, or drizzle the tops of the cheesecakes with honey or balsamic vinegar syrup before serving.
 As for the crust, I added ground-up macadamia nuts and wildflower honey to the usual graham cracker crumbs, to make this an extra-special dessert from top to bottom. (You could also use almonds or hazelnuts.)
For the crust:
1/4 cup graham cracker crumbs
1/4 ground macadamia nuts
2 tbsp honey
Mix in a small bowl with a fork until evenly moist and sticky. Press evenly into the bottoms of four small, clear dessert cups.
For the cheesecake:
1 250-g block of cream cheese
1/4 cup white sugar
1 tbsp lemon juice
Whip together until smooth, then fold in:
1/2 cup heavy cream, whipped
Scoop the cream cheese mixture into the dessert cups, pressing down lightly to ensure there are no air pockets.
Chill for at least 3 hours or overnight.
1 250-g block of cream cheese
1/4 cup white sugar
1 tbsp lemon juice
Whip together until smooth, then fold in:
1/2 cup heavy cream, whipped
Scoop the cream cheese mixture into the dessert cups, pressing down lightly to ensure there are no air pockets.
Chill for at least 3 hours or overnight.
Monday, 10 May 2010
Bernie's Tiroler “Groestl” or “Roast”
I grew up in Austria, and this is my favourite “left over” recipe e.g. a little ham/bacon/veggies leftover and added to the potatoes that are always at home. It’s also quite simple to make and surprisingly tasty for the few simple ingredients used...
Tiroler “Groestl” or “Roast”
This is an original Austrian recipe which uses boiled beef, a regional speciality. I’ve adapted it so that it can be used with leftovers found in a British kitchen.
Ingredients for 2 people:
Basics
Tiroler “Groestl” or “Roast”
This is an original Austrian recipe which uses boiled beef, a regional speciality. I’ve adapted it so that it can be used with leftovers found in a British kitchen.
Ingredients for 2 people:
Basics
- 2 tablespoons oil
- 1 onion
- 400 g potatoes (boiled & peeled and sliced ca ¼ inch thick) These can be from the day before, unpeeled would also be possible but I always peel them.
- 1 teaspoon fresh parsley, chopped
- salt & pepper
- 2 fried eggs (optional)
- Veggie option
- 200g mushrooms
- 200g of bacon, ham, cooked beef, roast pork etc (whatever leftovers there are)
- The original recipe quotes ca. 120 g cooked beef, 70 g bacon; I usually mix bacon/ham and mushrooms
How to make:
- Boil the potatoes, peel and slice them.
- Heat up the oil, add chopped onions and meat and/or mushrooms and let them brown slightly (ca 5 minutes).
- Add the potatoes and roast everything through by stirring frequently so everything is heated up thoroughly (ca 5 minutes). The potatoes should be cold before adding to the pan to avoid stirring it into a “mash”.
- Season with salt, pepper and parsley.
- Serve immediately with a fresh salad, adding a fried egg on top (optional). Guten Appetit!

Monday, 8 March 2010
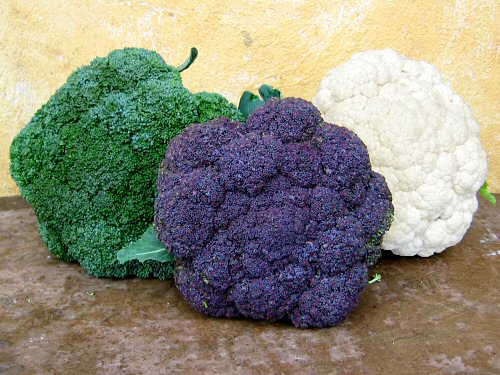
More Cauli for Your Lolly!
I was inspired to look at cauliflower. Cauliflowers are cheap and nutritious. I also have a great deal of memories of cauliflower cheese that I would rather forget- it wasn't so much that I didn't like it, but just that I need another then years before I eat if again! ...
1) Make the most of your cauliflower!!
There is nothing wrong with that stalk! Once you have washed it and removed any nasty bits, you just have to chop it into small enough pieces so that it will cook in the same length of time as the florets : ) More cauli for your lolly!
2) Be creative
WHY OH WHY in the UK do we only eat boiled/ steamed cauli or cauliflower cheese? There are hundreds of ways to cook other vegetables!
Cauli can also be pureed as an alternative (and low carb version) of mash potato. Puree the boiled/ steamed cauli with a knob of butter and LOTS of black pepper. Even add some chives and paprika if you feel daring...
3) If you still want to make cauliflower cheese!
- Put LOTS of cheese in it
- Don't skimp on black pepper (or red pepper if you like that)
- Try adding garlic
- Add the greens- they are nutritious and delicious
- Toast it under the grill before you serve it
- Add a bit of leftover chopped bacon
- Why not add some spinach as a variation upon eggs florentine?
4) Another alternative: an idea from seaweed snack, a blog that I was reading: http://seaweedsnacks.blogspot.com/2009/11/olive-oil-and-cumin-roasted-cauliflower.html . Below I have adapted from the original text:
Yesterday I coated cauliflower with olive oil, cumin, nutritional yeast, and then roasted it in the oven. Nutritional yeast is a yellow powder that is used by many vegetarians because of its high protein and B vitamin content. These tend to be in short supply in children's diets. Some contain B-12, but only if it is specially added.I topped mine with fresh coriander, but that is the adult version. And, this took less than 10 minutes to prepare!
Olive Oil and Cumin Roasted Cauliflower
oven 375F/ 195 C for 20 min.
1 head cauliflower broken into pieces
1-2 tbls olive oil
1 tbls cumin (or less if you are not a cumin fan)
pinch salt
1-2 tbls nutritional yeast
In a bowl, drizzle olive oil over cauliflower and mix well with you hands making sure each piece is coated. Add cumin, pinch salt and nutritional yeast. Mix with a spoon to coat. Be sure to really get all the yeast and spice on the bottom of the bowl coated on the cauliflower. Carefully spread on a cookie sheet and bake.
Top with a couple of pieces of fresh torn coriander.
Other ideas:
Serve this as a vegetable accompaniment
If you don't like Cumin, or don't have yeast, why not roast it with a drizzle of honey, or a drizzle of sesame oil?
Saturday, 27 February 2010
WONDER likes: 101 Cookbooks

photo: Heidi Swanson
Heidi Swanson's 101 Cookbooks blog is amazing. It's not just the food, it's the great pictures too. This gal manages to make vegetarian look and sound so enticing that you don't even realise that it's a veggie blog. And with meat production leading to rising prices for the basic staples that some of the world's poorest people rely on- maize, wheat and soy, for example, as we in the West now eat WAY more than the recommened 100g of protein a day that we are recommended, and a large amount of that is unnecessary animal protein, this is a resource that we could do with.
Not forgetting that for people on a budget, veggie tends to be much cheaper. You might have a few investment costs in some key herbs and spices, but that will still probably cost less that one person's meat budget over a fortnight...
Don't be fooled: this is about so much more than nut roast and tofu!!!
Friday, 26 February 2010
Noelita's Dhal Curry - Yum Yum

picture from: http://tamarindindian.com/uploads/dhal.jpg
I was brought up in London in a Sri Lankan immigrant family. Sri Lankan Dhal Curry was the first curry I learnt to cook at age 11, by watching my mother and father prepare it in the kitchen. It is really so simple, that a child can do it...Ingredients
- Red Lentils (1 cup)
- 1 Onion, chopped fine
- 1/2 Teaspoon tumeric
- Garlic - 1 or 2 pips, chopped
- 3 Red dried chillies (or green chillies if you don't have)
- Mustard Seeds, 1 tsp
- Cumin, 1tsp
- Curry Leaves, 1 sprig - optional
- 1/2 Cup coconut milk (if you don't have it, use cow's milk)
Method
- Soak lentils in water for an hour.
- Wash + drain a few times until water is clear.
- Put in pan + cover with water.
- Boil medium heat, until they just open up.
- Add 1/4 teaspoon tumeric
- Add coconut milk + salt. Turn off heat and set aside.
- Heat oil in frying pan, add curry leaf + onion + garlic and fry for a while.
- Add tumeric, cumin, mustard seed + dried chillis. Fry until onions golden.
- Add this mix into lentil curry, bring to boil.
[Serve with brown/white rice and some other Sri Lankan goodness]
Tips:
This can be frozen (and is easy to make in large batches!) and will last in the fridge for 3 days.
Recipe with thanks to Noelita
Tuesday, 23 February 2010
Kedgeree: Spicy Delight from Leftover Rice

Kedgeree was one of my favourite childhood dishes, and is still something that I love to tuck into.
The dish became famous when Victorian British colonial types brought it back from India as a breakfast dish, but it has been argued that it originated in Scotland, got adapted in the subcontinent, and returned in a spicier incarnation.
In hot, pre-refridgeration India, fish was served at breakfast time, whilst it was still fresh. This is too hearty a breakfast dish for me, but an excellent dinner or possibly brunch.
The recipe usually calls for curry powder, cooked rice, flaked smoked haddock, chopped boiled egg and perhaps some parsley or coriander garnish, but once you have the principle it is very adaptable.
Step by step:
- The cooked rice (you might want to warm it first in the microwave so that you don't have to fry it for a long time, or warm it through with hot water)
- Put some oil in a large frying pan or wok, and add curry powder, chili powder or other spices. If you wanted to add sauteed onions, now is the time to cook them.
- Before adding the warmed rice, turn the chopped (quartered or sixteenthed) boiled eggs and flaked smoked haddock (you could substitute this for bacon or cold, chopped meat) in the hot oil and spices so that they are warmed through or cooked).
- Add the rice, mixed it thoroughly until it is piping hot in the oil and spices
photo with thanks to crisphin
Brilliant Banana Cake

Prep time: ~15 minutes
You need:
Butter- 125g
Sugar-3/4 cup
1 egg
ripe, mashed bananas-2
1 1/2 cups self raising flour
1/4 cup of milk
you could also add a complementary flavour such as vanilla, poppy seeds or think about substituting some of the sugar with a brown or muscavado sugar.
To make:
Take the sugar and butter (and vanilla if you are using) and melt in a saucepan. Add the bananas and mix well. Beat the egg and then mix that into the mixture in the pan, followed by the flour. When the mixture is well mixed slowly add the milk and mix gently. Put the mixture into a cake tin and bake for around 4o mins at 170 degrees/ Gas mark 3-4.
Delicious :)
To serve:
Excellent as a cake, it is also wonderful hot with cream or vanilla icecream as a warming pudding.
===
Don't want to waste banana skins? Make them into fertilizer
photo with thanks to KCanard
Egg Substitutions

How often do recipes call for something that you almost have?
- When making custards or salad dressings you can substitute two egg yolks for one whole egg.
- In dough containing yeast or cookie dough substitute two egg yolks for one egg, and add a tea spoon of water.
- If you are baking and find yourself one egg down (but only one! This won't work for more than that!) substitute two tablespoons of mayonnaise
Onions & Old Tights: The Perfect Pairing?

If you are like me, and wear tights to work most days in the winter, it is highly likely that you have laddered a fair few pairs in your time.
I always feel a bit guilty throwing them away when there is only a small hole, but in a very visible place where painting the hole with nail varnish or sewing it up is impossible- so much of the tights are still good!
Imagine my joy when I learned that old tights can be used to keep onions fresh for up to 6 months- especially as the red onions and banana shallots that I love to cook with seem to go mouldy really quickly.

Here's the trick
Take a pair of tights (clean please!) and put an onion in each food. If the toe has a hole, you might want to sew it up first, of tie a knot in the bottom. Above each onion tie another knot, put in the next onion and repeat, until the legs are full or all the onions are used up.
Hang them somewhere dry and cool- cellars, larders or in a cupboard.
top photo with thanks to Flickr To Me
bottom photo with thanks to J.C. Rojas
Milk it!
I remember a time when I was about 8. We were on holiday, staying on a boat, with an ice box and no fridge. It was the summer, and naturally enough the milk on our cereal wasn't quite as fresh as we were used to. We moaned.
But actually, milk which is "on the turn" is not bad for you, neither rancid or mouldy, and could be employed in other ways even if it not to your taste splashed into tea or liberally poured over cornflakes. In times passed curds were an important part of Irish food culture.
But actually, milk which is "on the turn" is not bad for you, neither rancid or mouldy, and could be employed in other ways even if it not to your taste splashed into tea or liberally poured over cornflakes. In times passed curds were an important part of Irish food culture.
- Check that it is actually "off". It sounds stupid, but as kids we were convinced that anything passed its sell-by date was bad. I have friends who are still like this. It is easy to tell with milk. If it smells fine, then it is fine, regardless of what the packet says. And you will know if it doesn't smell good!
- If it is a little sour, it can still be used for baking- cakes, biscuits and so on.
- Make cream cheese. You can leave it go sour (make sure it is still in its container or covered), cook until it boils wrap the remaining lumpy bits in a cloth (cheese cloth or muslim) and hang. The liquid needs to drain out but you will be left with delicious homemade fresh cheese, which you could mix with fresh herbs, finely chopped onions or garlic, or pretty much anything you fancy. For a different flavour you could also try adding white vinegar or lemon juice to the milk when it is cooling, which will help it to curdle.
- Another version of this is the Indian fresh cheese, paneer, which is pressed after the curds and whey have been separated. Once made, you could also preserve this cheese in olive oil.
- Make yoghurt. You need a bit of yoghurt to start with "live and active cultures" in it. Bring the milk to a boil. When it starts to get foamy on top, remove from the heat until it cools to around 46 degrees C (115 F) or until you can hold your finger in it without it burning. Put a couple of spoonfuls of yogurt in a jug and blend it together with some of the warm milk. Pour the mixture back into the pot of warmed milk and stir. Pour the warmed milk into clean containers (large glass bottles or washed and dried 4 pint milk cartons could be good), put the lids on, cover with the containers with a towel, and put them in a cool, dry, undrafty place over night. Wake up to fresh yoghurt!
Traditional Irish Curd Cake

Traditionally this would have had a pastry crust, but in the interests of health, and speed, you might want to just bake the mixture in an oven-proof dish, or you could experiment with using broken digestive or ginger biscuits as an alternative base.
Lemon and Vanilla Curd Cake
You will need:
- 175g/ 6oz sweet shortcrust pastry or a pre-bought pastry case (if using)
- 50g/2oz caster sugar (+ 1 tbsp for the topping)
- vanilla essence or extract
- half a lemon (juice and grated rind)
- 1 egg (beaten)
- 2 egg yolks
- 225g/ 8oz cottage cheese (homemade or bought)
- 2 heaped tablespoons of plain flour
- 1tbsp melted butter
- Preheat oven to gas mark 4/ 180°C/ 350°F
- If you are using pastry: warm a baking sheet and grease a loose-bottomed flan tin. Roll out the shortcrust pastry until thin, then line the flan tin with the dough, trimming off any excess. Chill pastry case (that you have made or bought) in the fridge.
- If you are not using pastry put your broken biscuits into the bottom of a dish for a more informal but equally delicious family pudding. Ignore this step if you simply want a set curd putting without pastry or biscuit.
- Sieve the cottage cheese, or your freshly make paneer/ cream cheese.
- Cream together until fluffy the butter and sugar, before beating in the egg yolks, 1 heaped tbspn flour, lemon zest, lemon juice and the cheese. Mix well.
- Spoon the mixture into the pastry case/ onto the biscuit base or put into the dish on its own.
- Mix together together the beaten egg, one tbspn flour, spoon of caster sugar, 1tbsp melted butter sugar (you might also want to add further lemon zest). Spatula evenly over the curd filling.
- If you are using pastry in a flan tin, pop it onto the warmed baking sheet. Otherwise just put your dish into the oven and bake for around an hour. When it is done the top shoul dbe a little brown and a bit firm.
- Best served cool, not chilled. You could dust with sugar or garnish with grated lemon rind.
Beacon Bruithe- Irish Baked Mushrooms
Oh, the olden days, when you could pick mushrooms in the fields...
But in the modern day you can pick them up cheaply in the supermarket and make a filling meal or breakfast for not too much. This recipe also allows you to use up stale bread and when it calls for sausagemeat, gives you the perfect opportunity to use up the last couple of sausages in the fridge (just take the meat out of the skins).
Ingredients
15 big mushrooms (or 1kg)
4 oz diced onions
4 oz bread crumbs (use up your stale bread or savoury scones- whole wheat is best)
4 oz sausage meat (you could use up the last few sausages)
1 tspn herbs (sage is good, but you could try chives, thyme, marjoram, garlic, parmesan, leftover cheese)
salt and black pepper to taste
butter or olive oil
Directions
- Wash and peel the mushrooms. You can use the stalks- just make sure they are washed and cut off the dry end.
- Set the oven to moderate.
- Brush mushrooms with melted butter, or olive oil for healthier and quicker option
- saute the onions in butter or oil. When they are translucent mix them with the breadcrumbs, the sausagemeat, herbs, salt and pepper.
- Put the mushrooms in an oven proof dish, if you are using the stalks (we don't like waste around here!) also put them in the dish. Put a little water (~5oml) in the bottom and place the mixture into the mushrooms.
- Bake for 15-2o mins
Keeping Cheese for Longer

She tightly wraps her cheese in a cheese cloth which she has rubbed butter into and leaves it in a cool, dark place (fridges can be damp and can actually make cheese go mouldy more easily). Besides, cheese tastes better at room temperature. The cheese keeps fresh and neother goes mouldy nor cracks. The fat in the cloth stops bacteria, moulds and damp getting in.
Cheese needs to breathe, so wrapping in cling film is not always the best option for long term preservation, and remember that cheeses can absorb smells and strong smelled cheeses can make other food smell.
Other tips:
- You can always freeze cheese. You need to make sure it is airtight and sealed to prevent freezer burn. This is fine for cheeses like cheddar, and cheeses that you want to use for cooking, but I wouldn't recommend it for soft or cream cheeses, or a speciality cheese.
- Mouldy hard cheese is not dangerous, although it may not taste great. Just cut off the mouldy part and a little more (5mm, 1/4 inch) and it will be fine.
- You could just brush the cut end of the cheese with butter or olive oil
- If you have a bit of left over cheese you could always make a Mediterranean-inspired cheese in olive oil.
- The general principle is to try to keep it dry and airtight. Some people use aluminium foil, others may use a cloth or paper towel sprayed with vinegar to keep it air tight. The vinegar flavour would affect the taste of the cheese though...
photo with thanks to MarxFoods.com
Mediterranean Inspired Cheese Preserved in Olive Oil
Olive oil- golden goodness. We have heard it said hundreds of times, but have you ever thought of it as a preservative? It keeps out air and the bacteria that lurk in it
It has long been used as a traditional preservative in Mediterranean countries, and you can often find Greek feta or halloumi, or the Spanish sheep's milk cheese, Manchega, preserved in olive oil.
If have bought lots of cheese which you are not sure how to get through, want to make an exciting tapas or are just feeling creative, why not try preserving cheese in olive oil?
Before you preserve the cheese:
bottom photo with thanks to Neven Mrgan
It has long been used as a traditional preservative in Mediterranean countries, and you can often find Greek feta or halloumi, or the Spanish sheep's milk cheese, Manchega, preserved in olive oil.
If have bought lots of cheese which you are not sure how to get through, want to make an exciting tapas or are just feeling creative, why not try preserving cheese in olive oil?
Before you preserve the cheese:
- It must be clean and dry. Use paper towels and cut off anything you have doubts about. Make sure your hand are clean before you touch it.
- The jam jars or kilner jars you use must be completely clean and dry and sterilized.
- Cut the cheese into small cubes and place in the jar
- Cover the cheese with olive oil, although not right up to top of the jar.
 Extra virgin olive oil will give you the best flavour.
 - You might want to add some flavours to the oil, such as garlic cloves, sprigs of rosemary, chili peppers, oregano, thyme and basil. They should be dry.
- Once you open it, remove any sprigs of herbs- once exposed to the air they might deteriorate and the oil will already have taken on the their flavour.
- Don't waste the oil! Drizzle it over salads, fresh bread or as an accent on top of a bowl of home-made soup.

bottom photo with thanks to Neven Mrgan
Flavouring Olive Oil

Flavouring Olive Oil
Good flavours: garlic, oregano, rosemary, bay leaves, chillis, dried paprikas, cumin seeds, thyme and basil.
How to:
- Take a jar or bottle, sterilised, clean and dry
- Fill with oil, but not all the way to the top
- Add your flavourings, which should be dry, not wet, and not washed, to keep their flavour. herbs from your garden or window box would therefore be ideal as you know where they have been, and where you have dried them!
- Seal tightly
- Store in a cool dry place for two weeks (1 week if using fresh chillis) before removing the herbs, which should have imparted their flavour. This will allow the oil to keep for longer.
photo with thanks to cerolene
Nutritious Nettles
If you ever ran outside in shorts as a child in the countryside, chances are that you realised the hard way that this country is full of stinging nettles.
But nettles, far from only being a blight, can also provide great (and free) greenery for you kitchen.
Nettles can be substituted for spinach in most recipes. Younger nettles will be sweeter than older nettles.
To pick nettles it is advisable to wear rubber gloves. Chop the nettles and blanch

To freeze nettles (they will last around 2 months in the freezer- defrost for ~ an hour in a bowl of cold water) 2lb of nettles will reduce, like spinach, to give you around 4 cups.
- Remove the leaves from the stems
- Blanch (to stop decay even whilst frozen and to get rid of the stingi-ness). You need to do this in a large pan of boiling water over a high heat. Drain, retaining two cups of water, once the water returns to the boil.
- Saute gently in olive oil over a fairly gentle heat. You might want to add chopped garlic, chili flakes to the pan first. Stir them in the oil for a couple of mins to release their flavours. These flavours will intensify in the freezer. You need to cook them until they are mushy and most of the water has been cooked out.
- Separate them into freezer bags, remove the air and remember to write on the date. Put in the freezer when they are cool.
photo with thanks to Mr & Mrs Stickfingers
Spinach and Peanut Curry (Mchicha)

This tasty dish is satisfying, unusual and tasty. Tanzanian food often uses coconut, and this is no exception. Use in place of a vegetable with roast meat, or develop it into a delicious meal of its own.
You need:
makes enough for 5 people
1kg/ 2 lbs spinach (fresh or frozen)
1 1/2 ounces peanut butter (the more natural the better) or a cup of finely chopped peanuts
1 tomato
1 onion
2 teaspoons curry powder (or paste, your favourite blend!)
1 cup coconut milk (or use fresh or dessicated)
3 tablespoons butter, margarine or oil
Pinch of salt
To make it:
photo with thanks to certified su
- Wash fresh spinach and chop.
- If you are feeling dedicated, peel the tomato, for practicality, just chop.
- Peel the onion, and chop.
- If using them, mix peanut butter with the coconut milk.
- Put the fat into a big frying pan, on a medium heat.
- Add onion, tomato, pinch of salt and curry of choice. Cook for 5 mins, stirring and making sure it doesn't burn. If you are using chopped peanuts, add them now.
- Add the spinach and cook for another 15 or 20 mins, until the spinach is cooked (if you are using frozen spinach, you will need to thaw it first)
- If you are using grated coconut, put it into the pan straight after the spinach. If using the peanut butter/ coconut milk mixture, add it just before the spinach is cooked, and let it simmer for about 5 minutes. Stir it to make sure it doesn't burn!
- Eat it with rice as a main course
- Why not add some toasted peanuts as a garnish?
- Add some leftover meat along with the onion.
- Why not wrap leftovers in a tortilla for a tasty lunch the next day?
Keeping Hen's Eggs Fresher for Longer

The delicious smell of rotten eggs. I'd be happy to never have to smell it again.
Buying eggs
- The colour of the shell isn't important, but shiny eggs are likely to be older (the eggs above have been died so are meant to be shiny).
- Back in the day, when hens laid fewer eggs during midwinter, people would store eggs in advance by gently rubbing a little butter onto the shells. The butter stops air moving through the porous shells so that bacteria cannot get in. Instead of butter you could use oil or glycerine. Put them in a pot with a lid and store in a cool, dark place. A cellar is perfect. Best for fresh eggs- eggs bought in shops may already have been treated with preservatives and you can never tell how old they are. Make sure that you wash the eggs first do get off any dirt before you brush them with butter.
- Mark eggs with a pencil. You can devise your own secret code, but even a small line would help you tell older ones from newer ones.
- Find out how fresh your egg is. Put it in a cold water. Fresh eggs lie on their sides, older eggs will stand upright. Eggs that float to the top are old- avoid at all costs!
- If you aren't going to put oil or butter on your eggs, don't wash them before storing! Washing them will also remove the protective coatin and they will actually go off more quickly.
- Sometimes it can seem that the only place for a cracked egg is the bin. But you can still boil it if you wrap them in foil first, or you could always freeze it (see below). This is only a good idea if you cracked the egg yourself! If it arrives cracked, best to dispose of it as you cannot be sure what could have got into the egg.
- Cover egg yolks in water to keep them for longer
- Egg whites needs to be stored in a clean, dry, air-tight container.
- To insure lasting freshness of eggs, rotate and mark them. If you place a small pencil mark on old eggs you will be certain to identify them and use them before recently purchased eggs.
- When you hard boil eggs and are intending on keeping them stocked in the fridge, have you thought of putting a drop of food colouring the water to make sure that you can distinguish them from raw eggs? Another, greener, more waste-friendly tip is the traditional Cumbrian method of boiling eggs with onion skins. The more onion skins, the stronger the dye.
- Don't be tempted to freeze boiled eggs. Their texture and taste will change.
- Break the yolks, as they don't freeze well otherwise.
- You can freeze yolks and whites separately, or together.
- If you mix yolks and whites together and freeze in an icecube tray, two cubes would be equivalent to a large egg.
- Whole eggs cannot be frozen; the shells will crack as the liquid expands.
- If you add one teaspoon of vinegar to water when boiling eggs they may not crack.
- Cotton-buds are you friend if you only want egg white. Even a little yolk or oil can ruin a recipe, so remove drops of yolk with a cotton bud. If you are using an electric whisk ensure that there is no oil on the blades.
- Slice hard boiled eggs more easily by dipping the knife in water first.
photo with thanks to ANDI2...trying to catch up
Carrot Curry

I learned how to make carrot curry from a Sri Lankan Tamil friend. It quickly became a favourite of mine, and went down a storm with guests. Her recipe was for a vegetable accompaniment- something to go with rice, lentils (dal) and a meat curry. This recipe has the potential to stray quite far from the authenticity of the original (apologies), but with tasty results. You could also use this method with grated potato, parsnips, swedes and other root veg, or with boiled/ steamed broccoli, cauliflower etc
Basic recipe:
- one small onion, diced
- 6 grated carrots
- garlic clove
- cumin (jeera)
- mustard seeds
- curry powder (not garam masala- madras would be good)
- garlic
- oil
- Put the oil (groundnut oil is best, but I usually use olive oil as it is at hand and it is still delicious) into a large frying pan. Add a teaspoon of mustard seeds and the same of cumin seeds. Let them cook for around a minute, but not until black.
- Add the diced onion and sweat/fry them until transparent. Sometimes I like the onion crispier- it doesn't matter. With this curry it is never quite the same twice as there is so much room for experimentation.
- When the onion has cooked, add the grated carrot and diced garlic. You must remember to stir often. It will take around 15-20 minutes on a medium heat to cook.
- Authentically, this curry should be quite al dente but I like mine softer and possibly a bit crispy- for this to happen you will have to wait until the water (that will come out of the carrots) evaporates.
- Towards the end add some curry powder (to taste). It always tastes better cooked with some oil or butter- add a drop of oil and add the curry powder on top, allowing it to sizzle before stirring it in. Add salt to bring out the flavour!
- Also delicious if you add the juice from a thumb-sized piece of fresh garlic towards the end.
- Sometimes I like this as a main course on its own. It is wonderfully colourful. If I was doing this I would usually toast some peanuts (raw, with shells) in another frying pan and mix at the end. This is really simple and very tasty, and adds protein and substance.
- For a lazy, after work version I might stir in a couple of spoons of peanut butter. This is also great if you are microwaving leftover curry the next day or for a packed lunch. Tasty with leftover rice, or even in a tortilla/ chapati or naan.
- Use up left over carrots. The original uses grated carrots, but why not use leftovers instead? It would also be great with leftover broccoli, cauliflower, potatoes, and other root veg
- For a wetter curry, add some coconut milk (100-150ml) when the carrots are almost cooked. You could even just add cows' milk.
Terrific Toasted Monkey nuts

Peanuts can make a delicious snack, but I often find that they are too salty when bought in packets. I also love the crunch from the peanut skins.
Many shops sell raw peanuts still in their skins. Some of the most delicious peanuts I have eaten were the simplest: toasted in a frying pan over a low heat in Nairobi (you don't even need oil as they are naturally oily themselves). Put in enough to cover the bottom of the pan and keep stirring.
Delicious when they are still warm from the pan, or when cooled, you could think of adding chili flakes for more of a bite. Personally, I don't think that they need salt, especially when they are hot, as they are so tasty already!
Monkey nuts (peanuts still in their hard shells) are another great treat. When I last looked you could get them for pennies in Tesco. Put them in the oven, on a tray or in a casserole dish, and cook for around 25 minutes, Gas Mark 3, 325 F, 165 C.
Cool them for a while as they will be hot when straight from the oven, but they are delicious when still warm, great fun for kids to try to open, hot or cold, and use no added fat.
3 kilos of monkey nuts would produce 3-4 cups of peanuts.
If you wrap monkey nuts tightly and keep dry they should keep for up to 6 months in their shells.
photo with thanks to Miss Mass
Chicken Livers with Orange and Tarragon
Reading old cooking books in the deep winter, I came across a recipe in "Floyd on Britain and Ireland". I love chicken livers if they are well cooked, and these flavours really appealed. Upon eating, they tasted good too. Chicken liver is a stronger flavour than chicken, and the flavours played off each other really well.

My version (makes a great starter for four, or serve as a light lunch with fresh bread)
chicken livers (250g)
one medium onion/ large shallot
fresh tarragon, roughly chopped.
one small orange, halved. Cut one half into wedges to serve, and zest the other half, keeping what is left for the juice. (if you are doubling the recipe, you might also want to segment another orange and add that as a good-looking extra)
olive oil
Photo thanks to Jasmine&Roses

My version (makes a great starter for four, or serve as a light lunch with fresh bread)
chicken livers (250g)
one medium onion/ large shallot
fresh tarragon, roughly chopped.
one small orange, halved. Cut one half into wedges to serve, and zest the other half, keeping what is left for the juice. (if you are doubling the recipe, you might also want to segment another orange and add that as a good-looking extra)
olive oil
- Prepare the chicken livers. Chop off any stringy bits and cut into mouthful sized pieces.
- Dice the onion or shallot. Put a bit of olive oil into a frying pan and the sweat the onions until clear on a low heat.
- Turn up the heat. Add the chicken livers and stir constantly. After a minute or so, add the orange zest. When the chicken livers are almost done, add the juice from the zested half of the orange, keep stirring and then put the chicken liver and onions onto plates.
- Put plenty of fresh tarragon on top and garnish with the orange wedge, which can be squeezed onto the chicken livers.
- Serve hot!
Photo thanks to Jasmine&Roses
Subscribe to:
Posts (Atom)